How To Repair A Leaky Faucet

A leaky faucet is definitely not the most desirable thing to have in any house. The continuous water dripping sound can not only drive you crazy but there’s also an immense amount of water being wasted in the process. This can be very expensive. Fixing the faucet is unavoidable if you would like to save invaluable water and while keeping your sanity. To get started with the repair process, you should first detect the source of the faucet leak. In this article, we will discuss how to find the source of the leak and how to fix a leaky faucet.
Where Is The Faucet Leak Coming From?
Contents
- Where Is The Faucet Leak Coming From?
- Time to Repair Your Faucet
- How To Fix Your Faucet
- First Step: Turn off the faucet’s water connection
- Second Step: Take off the faucet handles
- Third Step: Remove the retaining nuts
- Fourth Step: Figure out what kind of mechanism your faucet uses
- Fifth Step: Take out the internal working components
- Sixth Step: Locate your replacement components
- Seventh Step: Reassemble the faucet with the help of replacement components
- Eight Step: Turn on the water supply and look for leaks
- Ninth Step: Great job!
- Conclusion
- Call R.F. Ohl For Trusted Plumbing Services
Take a closer look at the faucet and find the answers to the following questions. Make sure that the area surrounding the faucet is dry before you perform the repair task because this makes identifying a leak much easier. Also, look under the sink to find out if there are any water leaks.
- Is the water dripping from the spout even when the faucet is not on? If that is the case, then some or all the internal faucet parts would require replacement, based on the water condition.
- When turning the faucet on, does the water leakage happen around the faucet base while the water is flowing out via the spout? If you have answered yes to this question too, then the o-rings around the spout need a replacement.
- When turning the faucet on, does the water spray out or leak via the handle top? A stem or cartridge replacement would fix this. However, at times, a simple o-ring replacement could also get the job done.
- When the faucet is off, does the water leakage happen only around the faucet base and not the spout? The housing of the faucet could have had a pinhole leakage. This is not the norm but it cannot be ruled out either. In such a scenario, there could be water underneath the sink, inside the cabinet. Inspect all the flex line water supply connections for likely leaks. In case the faucet base is the sole reason for the leak, the faucet would likely require replacement.
However, if your faucet is not displaying the above signs, it’s recommended you get a plumber home for a faucet replacement. However, if you managed to locate the source of the leak, then that’s great news! You will be able to fix it easily. Let us head to the next stage now.
Time to Repair Your Faucet

However, prior to attempting anything at all, make sure that you can find the appropriate parts that you will need to fix your faucet. Be aware of the fact that sometimes it is difficult to find the parts to your specific manufacturer and it may be best to contact a reputable plumber.
Finding The Faucet Repair Parts
When looking for a local plumbing parts supplier, call the store or visit it a few times prior to kick-starting your faucet repair work. The best stores tend to have courteous staff and will ensure that you get exactly what you’re looking for. However, do not expect the store to house every plumbing supply material or equipment under the sun. Explain to the store what your repair work entails and find out if the necessary parts are available for purchase. Also, head early to the store. During weekends, the good stores are likely to be busy with DIYers that are also looking for assistance.
Allow For Enough Time
Another thing you must consider – do not bring or develop any preconceived ideas about the repair work and the total time it would take. If you do, then be ready to be disappointed, as even basic plumbing tasks need care and patience for proper completion. Ensure that you have a backup plan in place in case the project does not progress as expected or the issue at hand is a bigger concern. For instance, if there’s a leak in the kitchen faucet, find out if you could make alternate arrangements to source water for a couple of days. Plan beforehand so that you are not taken aback at any point.
Required Tools:
- Allen wrench
- Flathead screwdriver
- Crescent or box end wrench
- Rag or drain stopper
How To Fix Your Faucet
First Step: Turn off the faucet’s water connection
Usually, there are shut-off valves which are also called stop valves (a valve each for cold and hot water). They are located below the sink for use during such scenarios. If there is no straight stop or angle valve below the sink, the water connection to the entire house would have to be turned off.
Once the faucet’s water connection has been turned off, open the faucet by moving the handle and confirm there is no water flow at all. At this stage, it is recommended you place a rag, stopper, or anything that will clog the drain to remove any chances of parts going down the drain accidentally. This certainly happens and it certainly does not make the job easier.
Second Step: Take off the faucet handles
The majority of acrylic-style handles come with a cover button to conceal an underlying flat head screw. Usually, single lever handles come with an Allen recessed screw strategically and discreetly camouflaged in a spot that cannot be found easily when the faucet is turned off. You would, therefore, require a flashlight just to get a clear view of things.
Once you have deciphered the handle removal part, use a hex wrench or screwdriver (anything that works) to remove the handle. Normally, you are not required to completely get rid of the Allen screw from the handle while removing the handle. Quite often, a completely removed Allen screw gets easily misplaced or accidentally lost.
Third Step: Remove the retaining nuts
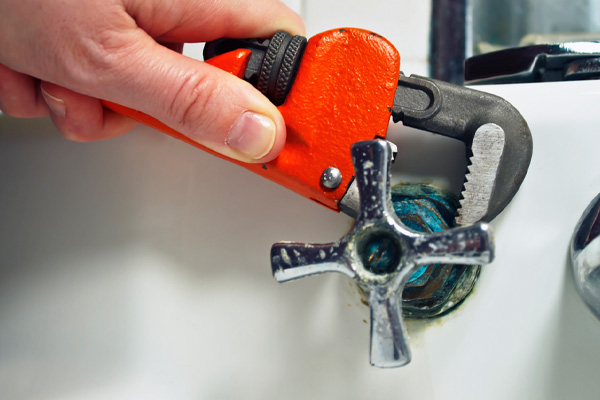
After removing the handle, you will notice a retaining nut holding the inner parts together. These nuts have exterior threads that hold onto the faucet’s primary body, based on the faucet’s primary design. We would suggest you use a crescent or box end wrench for removing the retaining nuts. Some of these nuts also add a cosmetic touch to the faucet and using channel locks or pliers could damage the overall finish.
Fourth Step: Figure out what kind of mechanism your faucet uses
Basically, there are three kinds of internal faucet movement mechanisms :
- Compression stems
- Ball assemblies
- Cartridges
The majority of single control faucets either use a ball assembly or cartridge. Generally, it is easy to differentiate between these styles. For faucets that are single-control faucets, the ball faucets come literally with a ball within (that has a small handle off-shooting from the ball). In case you’ve had a two-handle faucet, you could generally determine your style of the faucet by just turning the handle. If there’s a cartridge in the faucet, the handle would move right or left, turning half or a quarter turn. They stop at the same place every time you move them. In case the handle rotates beyond the halfway mark and keeps rotating 360 degrees till it hits its limit, then the faucet is a compression style variant.
Fifth Step: Take out the internal working components
TAKE A CLOSE LOOK AND REMEMBER THE SEQUENCE IN WHICH THE INTERNAL FAUCET PARTS ARE REMOVED. This stage is important. Several faucet repair kits do not have an instruction manual, and if the parts are not put back in the order they were taken out, you will have a bigger issue on your hands. We recommend writing things down, or perhaps capturing quick images of the faucet with off handles. You can take a series of photos while removing the components.
Different Internal Faucet Components
If you have a cartridge, you would then simply have to pull out the cartridge straight out. You can clean the ceramic disc cartridge and the rubber seals can get replaced. This will allow for an extended lifespan of your cartridge. However, if the rubber seals are replaced and the reinserted cartridge still gives you a leaking faucet, you would then have to buy a new replacement cartridge. At times, the ceramic discs could get scratched by grit or fine sand in the water, causing the leak.
If you’re getting rid of the retaining nut, with the stem threaded completely and affixed to the nut, then your faucet is a compression-style variant. The stem has a screwed-in washer at the bottom. If the washer’s metal retaining ring is in a good state, then only the washer may need to be replaced. In case the metal ring’s condition is not good, then the whole stem will have to be replaced.
With a ball assembly faucet, after removing the top cap, the cam becomes visible. The cam is essentially a plastic piece that has a lever poking via it. Get rid of the cam washer, cam, and assembly for controlling the lever ball. Inspect the control ball, in case it is scratched or damaged, you may have to replace it. Otherwise, you’ll only have to substitute the rubber valve springs and seats or possibly the o-rings.
Sixth Step: Locate your replacement components
It is ideal if you take the parts off and take them to a store that sells plumbing supplies instead of purchasing replacement parts prior to taking apart the faucet. This will help you avoid risking a return if they are not the right ones. You may look for the components yourself in case the repair kits are displayed on a wall. You can even seek assistance from a salesperson. Either way, do not exit the store until you are completely sure that the parts you’re holding match the ones you brought in. Also, it helps to know the faucet brand that you are attempting to repair. If you are not sure, you can present your pictures to the salesperson who will help you out.
Seventh Step: Reassemble the faucet with the help of replacement components
Here is where your notes or pictures become useful. All you need to do is put things back in the order they were taken off. Do not forget to coat the o-rings using the plumber’s grease. This is typically included in the majority of repair kits. Do not hurry when putting everything back together. Ensure every piece fits properly prior to moving ahead.
Eight Step: Turn on the water supply and look for leaks
In case the faucet is not leaking anymore, head to the next stage. If you are still having an issue and you did not replace all the parts, you should probably go back and replace parts that weren’t replaced before. If all the components were replaced in the first place, you’ll have to get a plumber on-board and get the entire faucet replaced.
Ninth Step: Great job!
The faucet should not be leaking anymore. Congratulate yourself and feel proud of the fact that you managed to bring down your water bill considerably. You also conserved a precious natural resource in the process.
Conclusion
Hopefully, this article has explained how to fix a leaky faucet and you will be well on your way. However, many homeowners attempt a DIY fix like this and realize halfway through that they made a mistake. When it comes to fixing a leaky faucet, sometimes it is best left to the pros. You will need to contact a reputable plumber to do the job. For any plumbing issues that you are experiencing, be sure to contact R.F. Ohl. Our certified and experienced plumbers have the skills necessary to get the job done accurately, quickly, and affordably.
Call R.F. Ohl For Trusted Plumbing Services
![]()
When you need dependable plumbing services, do not hesitate to call R.F. Ohl. Our company is one of the most trusted plumbing companies in the Poconos and the Lehigh Valley, Pennsylvania. We offer services such as water leak detection and repairs, installation of water-efficient plumbing fixtures, and water heater maintenance. We also provide the best solutions for any plumbing repairs you need while ensuring your family’s needs and budgets are met.
Rest assured, we have the most affordable plumbing services in the area. Each of our plumbers is licensed and experienced to ensure all services are done correctly. All our work comes with a guarantee. Contact R.F. Ohl to schedule a free estimate with us today.
Click here to contact us today or give us a call at (610) 377-1098 if you have any questions.