Ductless Mini-Split Wiring
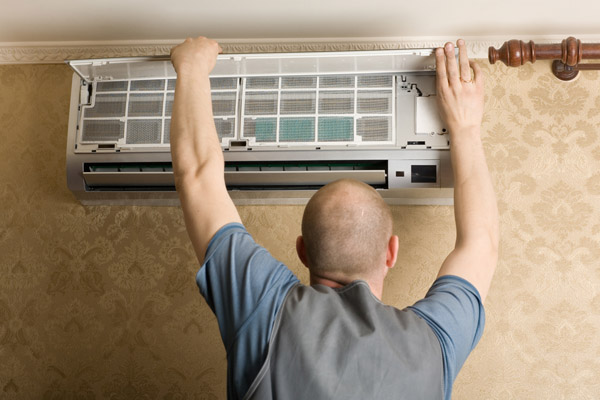
A popular and energy-efficient option for cooling and heating are ductless mini-splits. They consist of two parts, the indoor unit, and the outdoor unit. The outdoor unit holds the compressor and condenser. The indoor unit provides warm or cold air throughout the house.
Mini-splits are more simple to install than central heating and cooling systems. Furthermore, they are a bit more complicated than a window AC that you just plugin. Mini-splits have their own electrical line that connects to your house’s electrical panel.
A ductless expert will be able to help you if you are thinking about purchasing a mini-split system. There are lots of ductless mini-split wiring that is part of the installation. Therefore, a professional should help you. They have the proper training, skills, and experience to install your mini-split correctly. Also, they can make sure it will work at optimum efficiency and performance.
Ductless Heat Pump Wiring: Things Homeowners Ought To Know
Contents
This article discusses everything you need to know about mini-split wiring to make sure your system works properly for a long time.
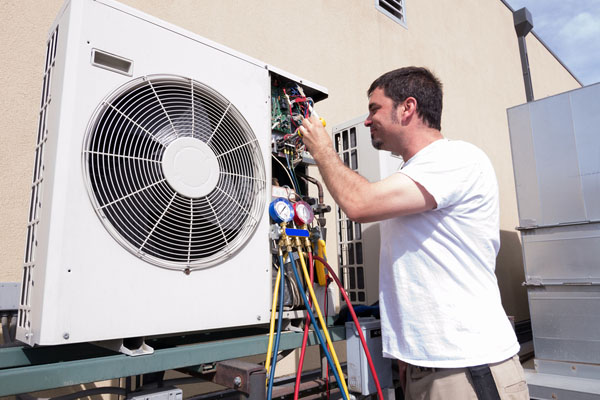
Electrical Service
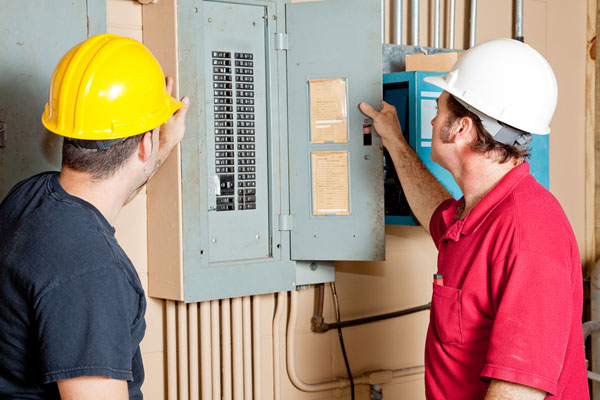
The electrical service panel supplies the outdoor unit with power. It uses a surge protector and a disconnect box for safety purposes. Electrical wires connect the two and have a weather-proof wire, or a whip.
Depending on the size and model of the mini-split, there are particular power requirements to follow. Typically, most systems need 220 volts or higher, but some of the 9k to 12k systems may only need a 110-volt service. It’s important the breaker panel is the correct size to take on any additional voltage since these systems permanently connect to the electrical service panel.
It’s best to work with a professional technician when wiring your electrical system. This will ensure that the work is done correctly and, also, that the warranty for your mini-split system remains intact.
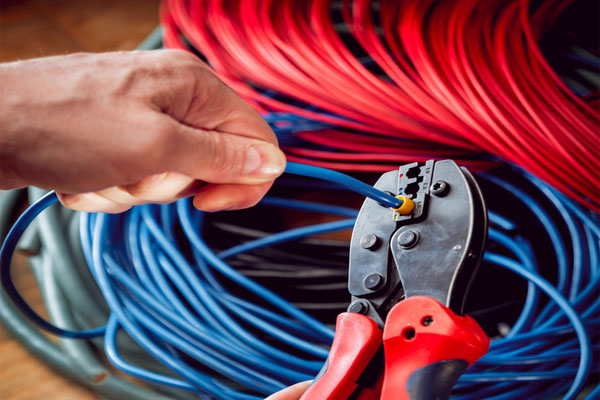
Wire Gauges
Mini-split systems need exact wire gauge or thickness. The connecting wire needs to be quality and the right gauge. If not, it can be dangerous. It should also be UL-listed for sun exposure. A UL-listed wire means that it has passed the Underwriters Laboratories’ safety tests. A technician can check to see if your electrical wiring meets all the requirements.
The standard size of wires is 2, 6, 8, 10, 14, and 16-gauge wire. The amount of current that can safely pass through the wire depends on its thickness. A lower gauge means a thicker wire that can handle more current. On the other hand, a higher gauge means that it is a thinner wire and can handle less current. For example, a #6 cable can handle 60 amps, while a #14 wire can only handle 15 amps.
Connecting Cable
Connecting cables, also known as the four-conductor cable, are a specialized wire between the outdoor unit and indoor unit. It carries information between these two parts of the mini-split and it also supplies power. Most systems use a 14 AWG 4-conductor stranded cable that runs through a conduit to meet local codes.
Disconnect Box: Non-Fused Versus Fused
A disconnect box also called a fuse box or a switch box contains the controls that supply energy to the mini-split. It allows an HVAC professional to turn off the power to your mini-split while conducting repairs or maintenance on your system. Furthermore, disconnect boxes are mandated to be installed near the condenser.
Generally, most homeowners would rather have a non-fused disconnect box than a fused one. This is because the breaker in the service panel protects the fuse. Also, homeowners can reset circuit breakers themselves. On the other hand, a fuse needs to be replaced. They can be hard to find and replace. Fuses are likely to be damaged by the elements, which makes the system unsafe.
Electrical Whip
The electrical whip is made up of high-voltage wires. It is located outdoors and is tucked away in a case to protect it from the rain, sun, and other elements. Also, electrical whips are mostly used to connect the 120v/220v power from the disconnect box to the condenser.
How An HVAC Contractor Should Wire Your Ductless Mini-Split
Now that we have talked about the different types of wiring for a mini-split, we need to talk about how it is wired properly. Installing a mini-split is quite challenging. You should not attempt to install one yourself. It’s best to contact a licensed HVAC contractor to get the job done.
These are the steps an HVAC professional will take when installing your mini-split:
Step 1: Install A Disconnect Box
A disconnect box must be installed to adhere to the code. A professional will run a 230/208- or 155-volt line from your home’s primary break box to where the disconnect box will be installed, usually next to your unit. An expert technician will make sure that the required voltage is met because each system is different.
Two hot leads are wired to fused connections in the disconnect box and the ground to the provided connection. Afterward, a faceplate will be attached after this and the on/off switch is inserted.
Step 2: Attach The Electrical Wire Whip
Next, a technician will run an electrical whip between the unit and the disconnect box. An electrical whip is an outdoor grade wire.
Step 3: Connect The Wires
Each mini-split is wired slightly differently depending on the make and model. Your technician is knowledgable about all mini-splits so they will have no problem connecting the electrical wires.
Step 4: Connect The Wires From The Indoor Unit To The Outdoor Unit
Depending on if you have a single-zone or a multi-zone ductless setup, there will be a different number of connections. If you have a multi-zone unit, the HVAC technician will number the indoor units for easy cross-referencing. This makes it easier to connect the wire colors to a specific number. A technician will ensure each indoor unit in a multi-zone system is connected to the same input its line set is wired to. This is very important to do because your mini-split will not function correctly if things are wired wrongly.
Step 5: Connect The Wires In The Indoor Unit
Similar to outdoor units, the HVAC contractor needs to make these connections in the indoor units in the proper order. There are three main wires and the ground wires that must be connected with the correct terminals. Some manufacturers require round crimp-style terminals that make sure the connection is secure. A professional will know if this is necessary for your installation process.
With all these steps completed, the electrical part of your mini-split installation is finished. However, if you run into any issues or have any questions regarding the electrical wiring of your mini-split system, contact your local trusted HVAC installation expert. They will be happy to assist you.
Protecting Your Investment
HVAC systems are a considerable investment. Manufacturers offer warranties that cover a wide range of possible circumstances like manufacturing defects. Most will not any cover damages that result from electrical surges.
A lightning strike, a power surge, or an irregularity in the power supply can lead to electrical surges. Surges can damage the electrical components of your mini-split system or even complete system failure. If this happens, you might need to replace your mini-split even if it’s only a few years old.
Installing a surge protector is the best way to avoid these damages. An HVAC technician can install a surge protector in just 15 minutes. Furthermore, this simple installation will make sure your system has the protection it needs.
Conclusion
Call a qualified HVAC professional for a simple and quick mini-split installation. These technicians have years of experience doing these types of installations, so they will make sure your mini-split is accurately wired. You can rest easy knowing your mini-split will work efficiently.
Check Out One Of Our Ductless Installation Projects
Ductless Panels Add Heat And AC In An Addition To A Catasauqua PA Home
Call R.F. Ohl To Learn More About Ductless Heating & Cooling Systems
![]()
If you want to discover what a ductless HVAC system can do for you, call R.F. Ohl. Our NATE-certified technicians will help you determine the type of HVAC system that works best for your needs.
R.F. Ohl is one of the region’s leading full-service HVAC companies. We offer a wide range of HVAC services, from installations and tune-ups to repairs and consultations. Also, we can help you find different approaches and solutions to ensure that our services meet your requirements and budget. Call us today for a free, in-home estimate.
Click here to contact us today or give us a call at (610) 377-1098 if you have any questions.